How To Replace Whirlpool Microwave Light: Easy DIY Guide
You can replace many Whirlpool microwave lights at home, but the correct method depends on the light type and model. In U.S. homes, Whirlpool microwaves typically use a 120-volt power supply, and some models have a replaceable bulb while others use an LED module that needs professional service.
Start by finding the model number and checking the owner’s manual. Then unplug the microwave before removing a cover. Never open the main oven cabinet unless you are a trained appliance technician, because a microwave can store dangerous high voltage even after it is unplugged.

Identify Which Whirlpool Microwave Light Needs Replacing
The first step is to identify the failed light. Whirlpool microwaves may have two separate lights:


- Cooktop or surface light: Shines down onto the range below an over-the-range microwave.
- Cavity light: Lights the inside of the microwave while it runs or when the door is open.
These lights may use different bulbs, covers, and replacement methods. A bulb that fits the cooktop light may not be suitable for the oven cavity.
Look for these symptoms:
| Symptom | Likely light |
|---|---|
| The range area is dark | Cooktop or surface light |
| The inside of the microwave is dark | Cavity light |
| The light flickers or works sometimes | Loose bulb, failing LED module, or wiring issue |
| The light stays on all the time | Control, door-switch, or wiring problem |
| Both lights fail at once | Power, control, or electronic issue |
A dark light does not always mean the bulb is bad. Check the microwave’s light setting first. Some Whirlpool models let you select High, Low, or Off for the cooktop light.
Find the model number on the inside frame of the microwave door, behind the door, or on the product label. Use the full model number when checking the Whirlpool Owner’s Manual and parts information. Similar-looking Whirlpool models can use different bulbs.

What You Need Before You Start
Gather the correct parts and tools before removing anything. The exact list varies by Whirlpool model.
You may need:
- The correct replacement bulb or LED module
- A Phillips screwdriver
- A small flat screwdriver, if the manual allows one
- A dry cloth or clean gloves
- A flashlight
- A stable step stool for an over-the-range microwave
- The microwave’s owner’s manual
Use only the bulb type listed for your model. Pay attention to:
- Voltage
- Wattage
- Bulb shape
- Base type
- Heat rating
- Appliance approval
- Whether the bulb is incandescent, halogen, or LED
Do not install a higher-wattage bulb because it looks brighter. Excess heat can damage the socket, lens, wiring, or control parts.
Let a recently used bulb cool before touching it. If the bulb has broken glass, wear gloves and remove the fragments carefully. Do not use the microwave until all glass is gone and the socket is safe.


How to Replace the Whirlpool Microwave Cooktop Light
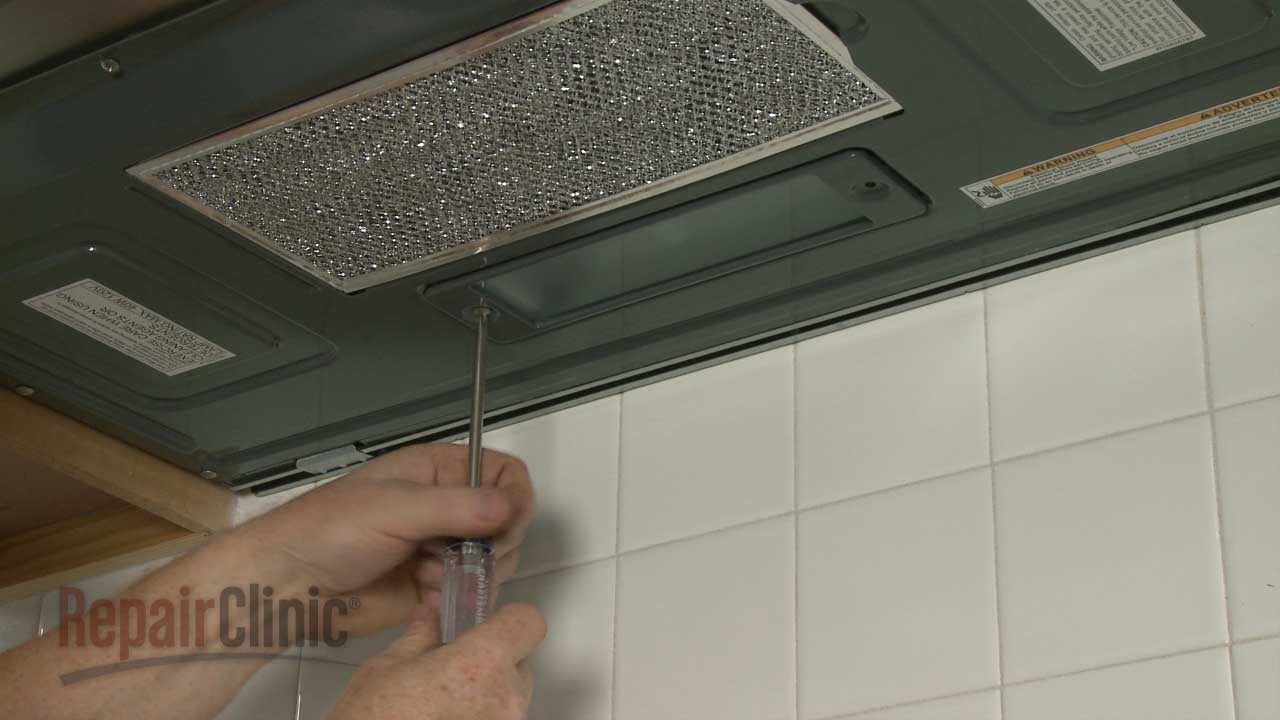
The cooktop light is often the easiest Whirlpool microwave light to replace. On many over-the-range models, the light is located underneath the microwave and is held behind a small cover.
1. Unplug the microwave
Disconnect the microwave from the wall outlet. If the plug is hard to reach, turn off the correct circuit breaker. Do not rely only on the light switch or control panel.
Wait until the bulb is cool.
2. Locate the light cover
look underneath the microwave near the front edge. The cooktop light cover may be held in place by one or more screws.
Support the cover with one hand while loosening the screw. Some covers are hinged or have a small tab, so do not force them down.
3. Remove the old bulb
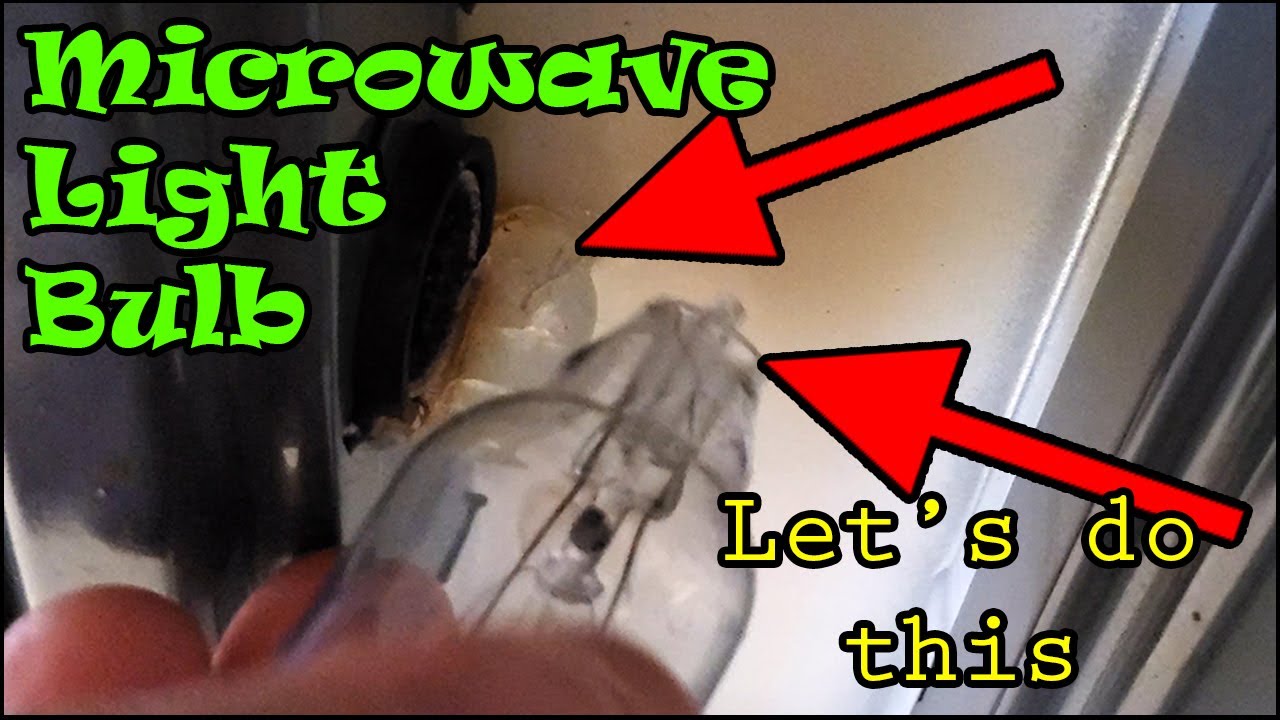
Turn the bulb counterclockwise if it uses a screw base. If it is a capsule or specialty bulb, follow the removal method in the manual.
Use a dry cloth rather than bare fingers when handling a halogen bulb. Oil from skin can shorten the life of some halogen lamps.
If the bulb does not turn, stop. A stuck bulb may have a damaged socket or corrosion. Pliers can crush the glass and create a shock or cut hazard.
4. Install the replacement bulb
Install the exact replacement specified for the Whirlpool model. Turn a screw-base bulb clockwise until it is snug.
Do not overtighten it. A tight bulb can damage the socket and make future removal difficult.
5. Refit the light cover
Place the cover back in its original position. Tighten the screw until the cover is secure, but do not strip the plastic or sheet metal.
6. Test the light
Restore power and test the cooktop light on each available setting. Confirm that the bulb turns on, the cover stays cool enough for normal use, and no flicker occurs.
If the new bulb does not work, turn off the power again before checking anything else.

How to Replace the Whirlpool Microwave Cavity Light
The cavity light is more model-specific. On some Whirlpool over-the-range microwaves, the bulb can be reached by removing the vent grille and an outer access panel. On other models, the light uses an LED board or requires cabinet access by a qualified technician.


1. Check the owner’s manual first
Search the manual for terms such as:
- Cavity light
- Oven light
- Interior light
- Light bulb replacement
- LED module
- Service technician
If the manual says the light is not user-replaceable, do not remove the microwave cabinet.
2. Disconnect power
Unplug the microwave or switch off its circuit breaker. Make sure the display is off.
For an over-the-range microwave, do not work from an unstable chair or overreach across the range. Use a proper step stool and have another adult nearby if the location is difficult to reach.
3. Remove only the access parts shown in the manual
Some designs provide access through the vent grille at the top front of the microwave. Others use a small light cover inside the cavity.
Remove only the screws and panels identified by Whirlpool for light replacement. Do not remove the full outer cabinet unless you are qualified to service microwave appliances.
4. Replace the bulb or light module
If the design uses a standard replaceable bulb, remove it as directed and install the matching part.
If the design uses an LED module, replace the complete module only when Whirlpool identifies it as a user-serviceable part. Do not substitute a household LED bulb unless the manual lists it as compatible.
5. Reinstall every cover
A cover can protect the bulb from heat, grease, and moisture. Refit it correctly before testing the microwave.
6. Restore power and test
Turn on the microwave light or open the door, depending on how the model operates. The interior light may not turn on in every operating mode, so test it using the function described in the manual.
If the microwave heats food normally but the cavity light remains dark after a correct bulb replacement, the fault may be in the socket, wiring, control board, or LED module.
What to Do If the New Light Does Not Work
A replacement bulb that stays dark does not always indicate a second bad bulb. Check the problem in this order:
- Confirm the correct light was replaced. The surface light and cavity light are separate.
- Check the bulb rating and base. A bulb can fit physically but still be electrically wrong.
- Make sure the bulb is seated. Turn off power first, then check for a loose connection.
- Inspect the socket for heat damage. Look for dark marks, melted plastic, corrosion, or a loose center contact.
- Check the light setting. Some models allow the cooktop light to be turned off.
- Test the wall outlet or circuit. If the entire microwave is dead, the issue is not limited to the bulb.
- Look for an LED module. A built-in LED light usually cannot be fixed by installing a standard bulb.
- Arrange service if the control or wiring may be faulty.
Stop troubleshooting if you smell burning, see melted parts, hear buzzing, or find damaged wiring. Turn off the circuit breaker and arrange service.


When You Should Not Replace the Light Yourself
Do not open the microwave’s main cabinet to reach a light unless you have the training and test equipment required for microwave repair.
Microwave ovens contain a high-voltage capacitor. That component can retain a dangerous charge after the appliance is unplugged. The risk is present even when the microwave display is blank.
Use a qualified appliance technician when:
- The manual does not describe homeowner light replacement
- The cavity light is an integrated LED assembly
- The bulb is inside the sealed cabinet
- The socket or wiring is damaged
- The microwave trips the breaker
- The microwave makes unusual buzzing or popping sounds
- The appliance has burn marks or a burning smell
- The light problem occurs with heating problems
- You need to remove the full outer cabinet
A service call is also the safer choice for a built-in unit that is difficult to remove or for an over-the-range unit mounted above a gas range.

Common Mistakes to Avoid
The most common mistake is buying a bulb by appearance alone. Whirlpool microwave bulbs can differ in base, size, heat rating, and wattage even when they look similar.
Avoid these errors:
- Installing a higher-wattage bulb
- Using a refrigerator or household bulb that is not microwave-rated
- Touching a halogen bulb with bare fingers
- Pulling down a light cover without removing its retaining screw
- Working while the microwave is still connected to power
- Removing the full cabinet for a simple surface-light repair
- Leaving the lens or access cover off
- Replacing an LED module with a random LED bulb
- Testing a loose bulb while power is connected
- Ignoring a damaged socket or melted plastic
The right part number is more reliable than a generic search for “Whirlpool microwave light bulb.” Use the model number and the parts diagram or owner’s manual for your exact unit.

Whirlpool Microwave Light Replacement: Quick Decision Guide
Use this guide before you begin:
| Situation | Recommended action |
|---|---|
| Cooktop light is dark and the bulb is behind an underside cover | Replace the bulb if the manual lists it as user-serviceable |
| Cavity light is dark but the manual gives bulb-replacement steps | Follow the model-specific steps |
| Cavity light uses an LED board | Order the correct module or arrange service |
| New bulb fails immediately | Disconnect power and inspect the rating, socket, and wiring |
| Socket is burned or melted | Do not use the microwave; arrange repair |
| Microwave is also not heating | Treat it as an appliance fault, not just a light problem |
| Cabinet must be removed | Use a qualified technician |
The deciding factor is not whether the light is easy to see. It is whether Whirlpool designed that part for safe user access.

Frequently Asked Questions
Can I use any LED bulb in a Whirlpool microwave?
No. Use an LED bulb only when the owner’s manual or Whirlpool parts information lists it as compatible. Microwave lights may face heat, vibration, grease, and limited space that ordinary household LEDs are not designed to handle.
Why is my Whirlpool microwave light dim?
A dim light may result from a low setting, a worn bulb, a failing LED module, a poor socket connection, or a control problem. If the light became dim after installing a replacement, confirm that the new part has the correct voltage and wattage.
Why does the microwave work but the light does not?
The heating system and light circuit can fail separately. A correct replacement bulb may solve the problem, but a faulty socket, wiring connection, control board, or LED module can also leave the microwave working while the light stays off.
Do I need to remove my over-the-range microwave to replace the light?
Usually not for the cooktop light. Many over-the-range models provide access from underneath or through the front vent area. The exact method depends on the model, so check the manual before removing the unit or its cabinet.
How often should a Whirlpool microwave light be replaced?
Replace it when it burns out, flickers, or becomes unreliable. There is no universal replacement schedule because bulb life depends on the bulb type, use, heat, and model design.
Conclusion
To replace a Whirlpool microwave light, first identify whether you need the cooktop light or the cavity light. Unplug the appliance, use the exact bulb or module listed for your model, and follow the manual’s access steps.
Surface-light replacement is often a practical DIY task. Cavity-light replacement varies much more, and any repair that requires opening the main microwave cabinet should be left to a qualified technician because of the high-voltage hazard.

Appliance Review Expert
Lucas Ramirez is a trusted voice at HomeFixGrid.com, known for his clear, practical, and creatively written guides that simplify appliance care for everyday homeowners. With a strong focus on hands-on testing and real-world problem-solving, Lucas brings expert insight into appliance reviews and troubleshooting techniques. Her work empowers readers to confidently maintain, repair, and choose the right appliances for their homes.